ORCID – Open Researcher and Contributor ID
The most important functionalities:
- precise identification of a researcher based on a unique alphanumeric code
- linking the researcher’s publication record with the unique number eliminates problems caused by name changes or personal data which are not unique
- contains basic information on a scholar’s publications and research projects
- can be connected to other databases and identifiers
- a universal tool used and required by most publishers
Recommended to:
- scholars publishing their research results
- researchers willing to get their unique identification number
- scholars trying to enhance their visibility on the Internet
How to register for an ORCID ID
Step 1
Visit https://orcid.org/ and set up a personal account. Enter your first and last name, e-mail address and password and define visibility settings (1). To increase your visibility on the Internet, choose everyone to be able to see the information added to your ORCID record. Confirm registration (2).

Step 2
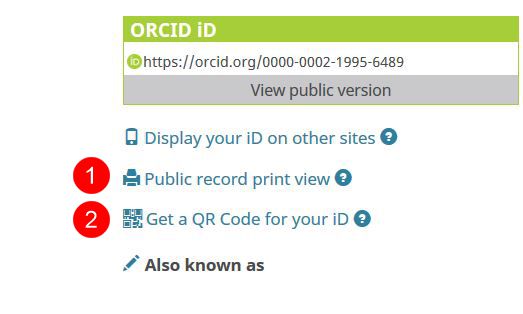
In the upper right corner you can find your unique identification number. On the left-side panel you see Public record print view (1), which offers the possibility of creating your publication record in a printed version and Get a QR Code for your iD (2).
Step 3
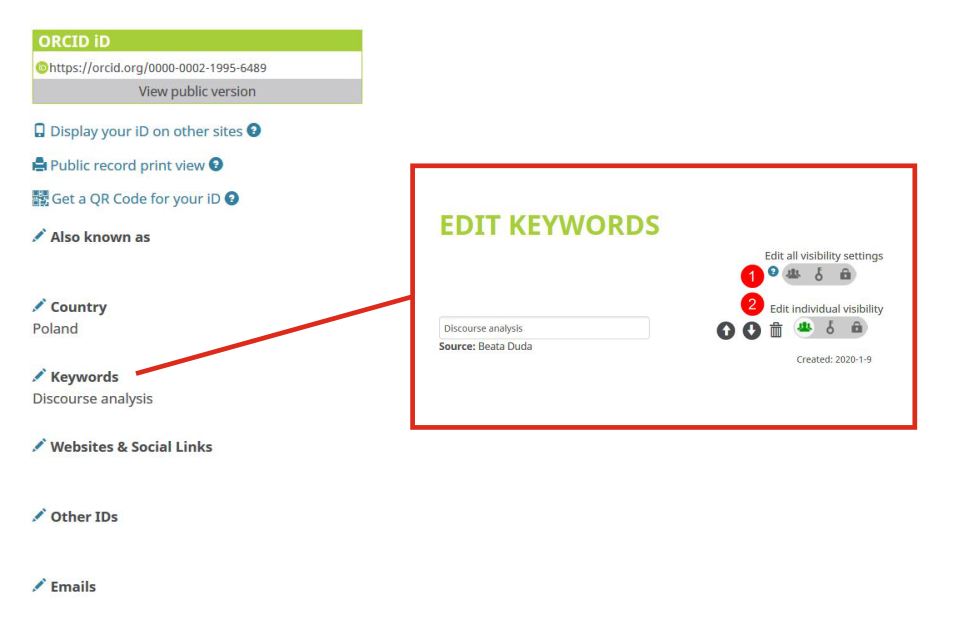
Complete the account setup: enter the information on the different versions of your name or pseudonyms used (Also known as), the country of your research activity (Country) and the keywords characterising your research fields (Keywords); add links to webpages and social media portals such as Academia.edu, Google Scholar, ResearchGate (Websites & Social Links), other identification numbers (Other Ids) and e-mail addresses (Emails). For each piece of information there are separate visibility settings. Decide (1) which data should be visible to everybody, which should be seen by selected users and which only by yourself.
Step 4
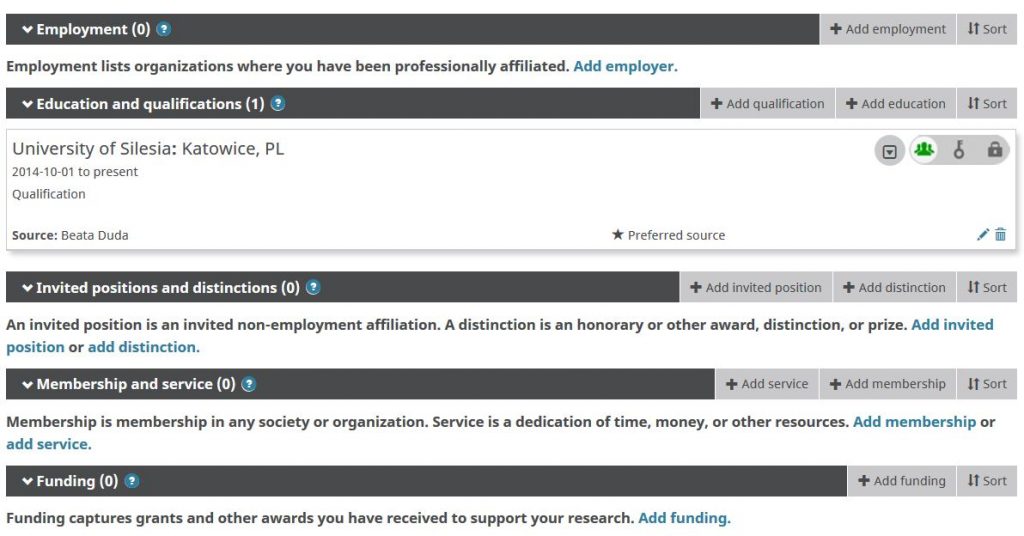
In the main page section enter the information concerning your employment and the institution that your publications are affiliated to (Employment), your education history (Education and qualifications), invited positions and distinctions in institutions other than your home institution (Invited positions and distinctions), membership in different organizations and voluntary work or service (Membership and service) as well as your grant projects (Funding).
Step 5
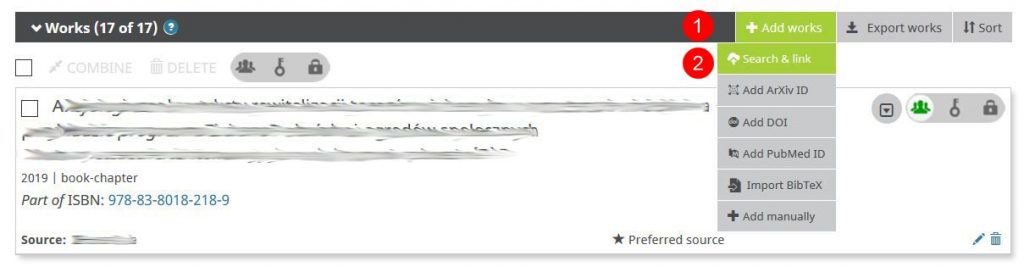
Complete your publication record (Works), using the possibility of linking your ORCID account with other information systems. In order to link your ORCID account with other databases (such as e.g. Scopus), go to the Add works bookmark and choose Search & link. After choosing a database, you will be able to authorize an automatic result download.
In other windows you will confirm the user account in the other database and the publications authored by you. Once the accounts are linked, your identification number from the other database will appear on the home page of your ORCID profile in the Other ids field.
Step 6
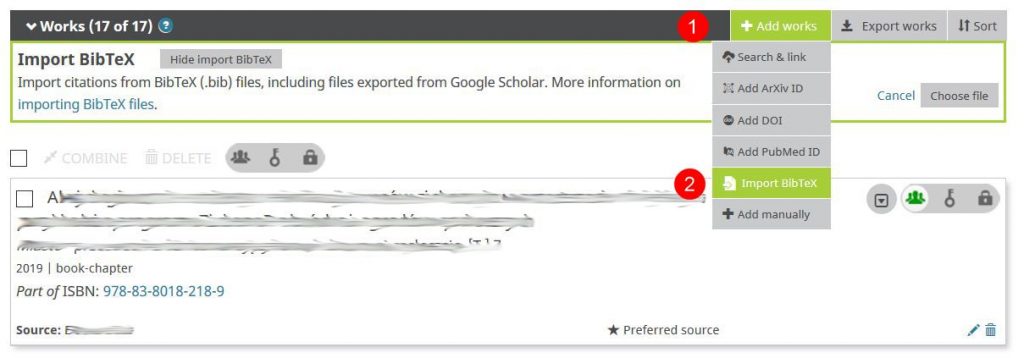
In order to complete your publication record in ORCID, you can import data using a previously generated (e.g. in Google Scholar) file BibTeX (.bib) or add files manually. Make sure that records are not doubled.
Step 7
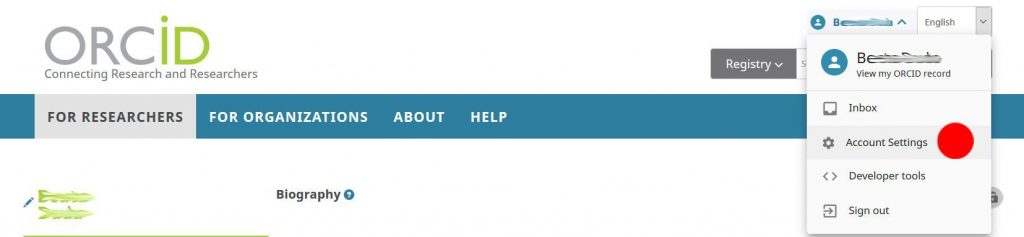
Click your account name in the upper right corner of the screen and choose Account settings. Find out the possibilities and organizations you have authorized for data migration.